發表於 程式分享

Visual Studio 2017 * Cordova for iOS debug

一.建置Cordova專案
1.開啟Visual Studio 2017 / 檔案 / 新增 / 專案 / 其它語言 / JavaScript / Mobile App / 空白應用程式(Apache Cordova)

二、Mac book 安裝remotebuild
1.安裝node
2.安裝xcode,安裝完後請執行xcode
3.執行xcode -select –install
4.執行npm install -g ios-deploy
一直失敗,後來改成如下指令就安裝成功了
sudo npm install -g ios-deploy –unsafe-perm=true –allow-root

5.執行sudo npm install -g remotebuild (含homebrew安裝)
並執行以下3指令
1) brew install libimobiledevice –HEAD
2) brew install ios-webkit-debug-proxy
3) brew install libimobiledevice
6.執行
1) 安全模式 :  remotebuild
2) 非安全模式 :  remotebuild –secure false

7.執行後,再執行remotebuild saveconfig產生組態,
請至/Users/grace/.taco_home/路徑查看RemoteBuild.config,
請記下hostname、port (若為安全模式,應該還有pin碼)
PS.我用hostname不行,後來改用IP =>  ifconfig | grep “inet “取得

8.啟動xcode及remotebuild

三、設定Visual Studio 2017Visual Studio 2017 * Cordova for iOS debug
1.開啟Visual Studio 2017 /  工具 / 選項 / Apache Cordova 工具 / iOS設定 /
iOS裝置支援資料夾 :
Ex.[IP]\Applications\Xcode.app\Contents\Developer\Platforms\iPhoneOS.platform\DeviceSupport\
1.PNG

2.Visual Studio專案需新增build.json
1) 申請開發者帳號,以取得Team Id
2) build.json設定如下,其中developmentTeam請用Team Id
2

https://cordova.apache.org/docs/en/latest/guide/platforms/ios/index.html#using-buildjson

4.請記得使用Release,不要用Debug,要不然無法remote debug
若未用Release,會出現如下訊息,無法debug

3

將偵錯工具連接至遠端 Apache Cordova 應用程式時,發生逾時。請查看輸出視窗,以取得 JavaScript 主控台輸出。
找不到您要嘗試偵錯的應用程式。請確定裝置已連線、喚醒且解除鎖定。此外,也請確定其已啟用 Web Inspector。
The application you are trying to debug could not be found. 
Make sure the device is connected, active, and unlocked. Also, 
make sure that it is with the Web Inspector enabled.

網路上關於此訊息有建議一些解法,最終是用Release就成功,其它建議說明如下,以備未來有問題可參考

1) 【OS X】:Safari → 偏好设置 → 高级 → 在菜单栏中显示“开发”菜单
2) 於Macbook執行remotebuild程式後,停子remotebuild後,
   執行remotebuild saveconfig,
   用vi開啟RemoteBuild.config檔,修改以下2設定為60000後存檔
       appLaunchStepTimout : 60000 (1 min)
       emulatorLaunchTimeout : 60000 (1 min)
再重新啟動remotebuild
3) 模擬器 -> 設定(Settings) -> General -> Reset -> Reset all Settings
4) Macbook模擬器的名稱需與visual studio所選的一致

3.visual studio debug macbook上模擬器畫面
1.PNG

四、開啟Xcode直接debug Cordova 專案 :
1) Visual Studio 2017 \ Debug \ iOS \ 選模擬器類的直接Debug
2) 最後會於Macbook上的此路徑的Applications\Xcode.app\Contents\Developer\Platforms\iPhoneOS.platform\DeviceSupport\產生序號路徑,
並至[序號]\cordovaApp\platforms\ios\可開啟此xcode專案專案 [project Name].xcodeproj,
當然也可直接在xcode上debug。

Ref.https://docs.microsoft.com/en-us/visualstudio/cross-platform/tools-for-cordova/first-steps/ios-guide

發表於 程式分享

Eclipse建立C++專案 – 使用bitcoin原始碼

為了能使用Eclipse建立C++專案觀看bitcoin原始碼,

試了如下步驟,compiler部份後續再分享~

1.至github下載bitcoin原始碼
https://github.com/bitcoin/bitcoin

2.下載MinGW
1) 並將其設定至環境變數path
Ex.C:\Tool\MinGW\bin
2) 請安裝g++

1.PNG

3.下載Eclipse for C/C++,
Ex.eclipse-cpp-oxygen-R-win32
http://www.eclipse.org/downloads/packages/eclipse-ide-cc-developers/lunasr1a

4.下載boost
1) http://www.boost.org/users/history/version_1_64_0.html
2) 設定Eclipse
Project -> 右mouse -> C/C++ General -> Paths and Symbols
2-a) Includes -> Add -> Ex.D:\library\boost_1_64_0\

1.PNG
2-b) Library Paths -> Add -> D:\library\boost_1_64_0\libs\

1

5.建立C++專案
1) File -> New -> C++ Project -> Executable -> Hello World C++ Project -> MinGW GCC

1
2) Prject Name請輸入bitcoin
3) 將步驟1下載的bitcoin原始碼路徑下的src複製至此新建Project的src路徑下

1.PNG

發表於 程式分享

Tomcat設定不同domain需連不同application

1.Tomcat新增webapps2路徑
1

2.Tomcat/conf/server.xml複製原Host name="localhost"區塊,
改為name="test"的區塊,
且新增Alias為新domain
1

3.重啟Tomcat
4.驗證
http://test.xxx.com.tw:8080/richOnline/  => 可連
http://localhost:8080/  => 可連
http://test.xxx.com.tw:8080/ => 不可連
http://localhost:8080/richOnline/  => 不可連

發表於 程式分享

hibernate 5.0 vs. 5.2.8 對於native sql的寫法差異

將程式由hibernate 5.0升級至hibernate 5.2.8一直卡在WHERE條件用in時,查詢結果會出現非此table object之錯誤訊息,但未加in條件時又正常。
試出來5.0有addEntity method指定table object,但5.2.8除了要用TypedQuery指定型別外,於createNativeQuery方法的第二個參數還要指定此table object(class),以下列出兩個版本對native sql的差異。

一、hibernate 5.0

String sHql = "SELECT t1.* " +
                    "  FROM JBContact t1 " +
                    " WHERE t1.cKind = :NotifyType " +
                    "   AND t1.userId in (SELECT empId " +
                    "                  FROM PREmp t22 " + 
                    "                  WHERE platForm = :PlatForm  " +
                    "                   AND funcId   = :FuncId  " +
                    "                   AND cmdId    = :CmdId  " +
                    "                   AND cmdEnable=1)";

SQLQuery query = session.createSQLQuery(sHql);
query.addEntity(JBContact.class);
           
query.setParameter("NotifyType", notifyType.getCode());
query.setParameter("PlatForm", platForm);
query.setParameter("FuncId", funcId);
query.setParameter("CmdId", cmdId.toString());

List<JBContact> jbContactList = query.list();

二、hibernate 5.2.8

String sHql = "SELECT t1.* " +
                    "  FROM JBContact t1 " +
                    " WHERE t1.cKind = :NotifyType " +
                    "   AND t1.userId in (SELECT empId " +
                    "                  FROM PREmp t22 " + 
                    "                  WHERE platForm = :PlatForm  " +
                    "                   AND funcId   = :FuncId  " +
                    "                   AND cmdId    = :CmdId  " +
                    "                   AND cmdEnable=1)";
       
TypedQuery<JBContact> query = session.createNativeQuery(sHql, JBContact.class);

query.setParameter("NotifyType", notifyType.getCode());
query.setParameter("PlatForm", platForm);
query.setParameter("FuncId", funcId);
query.setParameter("CmdId", cmdId.toString());
           
List<JBContact> jbContactList = query.getResultList();
發表於 程式分享

如何透過jersey client 實體化接收到的restful json為java class

1.java class是透過maven pom.xml以下設定,由.xsd檔產生java class檔
1) pom.xml片段

1.PNG

2) xsd檔片段

1

2.PNG

3) 產生的java class

package com.xxx.xsd.openacct;

import java.util.ArrayList;
import java.util.List;
import javax.xml.bind.annotation.XmlAccessType;
import javax.xml.bind.annotation.XmlAccessorType;
import javax.xml.bind.annotation.XmlElement;
import javax.xml.bind.annotation.XmlRootElement;
import javax.xml.bind.annotation.XmlType;

@XmlAccessorType(XmlAccessType.FIELD)
@XmlType(name = "", propOrder = {
"registerId",
"openAcct",
"drClientType",
"drtClientType",
"ctClientApplyType"
})
@XmlRootElement(name = "ClientListType")
public class ClientListType {
  @XmlElement(required = true)
  protected String registerId;
  protected boolean openAcct;
  @XmlElement(name = "DRClientType")
  protected List drClientType;
  @XmlElement(name = "DRTClientType")
  protected List drtClientType;
  @XmlElement(name = "CTClientApplyType")
  protected CTClientApplyType ctClientApplyType;

  public String getRegisterId() {
    return registerId;
  }

  public void setRegisterId(String value) {
    this.registerId = value;
  }

  public boolean isOpenAcct() {
    return openAcct;
  }

  public void setOpenAcct(boolean value) {
    this.openAcct = value;
  }

  public List getDRClientType() {
    if (drClientType == null) {
      drClientType = new ArrayList();
    }
    return this.drClientType;
  }

  public List getDRTClientType() {
    if (drtClientType == null) {
      drtClientType = new ArrayList();
    }
    return this.drtClientType;
  }

  public CTClientApplyType getCTClientApplyType() {
    return ctClientApplyType;
  }

  public void setCTClientApplyType(CTClientApplyType value) {
    this.ctClientApplyType = value;
  }
}

2.client接收的第一種作法是取得json字串再轉成json Object

  StringBuffer stringBuffer = new StringBuffer();
        BufferedReader bufferedReader = null;
        InputStreamReader inputStreamReader = null;
        String readSingleLine = null;
        try {
            URL url = new URL("http://127.0.0.1/restOnline/services/clientservice/getclient/123456789");
            HttpURLConnection connection = (HttpURLConnection) url.openConnection();
            connection.setRequestMethod("GET");
            connection.setRequestProperty("Content-Type", "application/json");
            connection.setRequestProperty("Accept", "application/json");
            connection.setDoOutput(true);
            connection.setConnectTimeout(5000);
            connection.setReadTimeout(5000);
 
            inputStreamReader = new InputStreamReader(connection.getInputStream());
            bufferedReader = new BufferedReader(inputStreamReader);
     
            while ((readSingleLine = bufferedReader.readLine()) != null) {
                stringBuffer.append(readSingleLine);
            }
            inputStreamReader.close();
            
            logger.info("stringBuffer: " + stringBuffer);
            JSONObject jsonObject = new JSONObject(stringBuffer.toString());
            logger.info("jsonObject-registerId: " + jsonObject.getString("registerId"));
            logger.info("jsonObject: " + jsonObject);
        } catch (Exception e) {
            logger.error(e);
            return false;
        } finally {
            try {
                if (inputStreamReader != null)
                    inputStreamReader.close();
            } catch (IOException e) {
                logger.error(e);
            }
        }       

3.client接收的第二種作法HTTP GET是取得json字串直接實體化為server的java object

   import java.io.BufferedReader;
    import java.io.IOException;
    import java.io.InputStreamReader;
    import java.net.HttpURLConnection;
    import java.net.URL;
    import javax.ws.rs.client.Client;
    import javax.ws.rs.client.ClientBuilder;
    import javax.ws.rs.client.Invocation;
    import javax.ws.rs.client.WebTarget;
    import javax.ws.rs.core.GenericType;
    import org.glassfish.jersey.client.ClientConfig;
    import org.glassfish.jersey.jackson.JacksonFeature;
    import org.json.JSONObject;
    import com.opensymphony.xwork2.Action;
    import com.xxx.xsd.openacct.ClientListType;
    
    ...
    ...
    
    private boolean getDRClientStatus2() {
        ClientConfig clientConfig = new ClientConfig();
        clientConfig.register(JacksonFeature.class);
        
        Client client = ClientBuilder.newClient();
        WebTarget webTarget = client.target("http://127.0.0.1/restOnline/services/clientservice/getclient/123456789");
        Invocation.Builder invocation = webTarget.request();
        GenericType genericType = new GenericType() {};
        ClientListType clientListType = invocation.get(genericType);
        
        logger.info("clientListType.registerId: " + clientListType.getRegisterId());
        return true;
    }

這個地方花了些時間找jersey client相關的套件,我使用的jar套件整理如下:

1.PNG

4.client接收的第二種作法HTTP POST是取得json字串直接實體化為server的java object

 
import java.io.BufferedReader;
import java.io.IOException;
import java.io.InputStreamReader;
import java.net.HttpURLConnection;
import java.net.URL;
import javax.ws.rs.client.Client;
import javax.ws.rs.client.ClientBuilder;
import javax.ws.rs.client.Entity;
import javax.ws.rs.client.Invocation;
import javax.ws.rs.client.WebTarget;
import javax.ws.rs.core.GenericType;
import javax.ws.rs.core.MediaType;
import org.glassfish.jersey.client.ClientConfig;
import org.glassfish.jersey.jackson.JacksonFeature;
import org.json.JSONObject;
import com.opensymphony.xwork2.Action;
import com.xxx.xsd.openacct.ClientListType;
import com.xxx.xsd.openacct.ClientQryType;
...
...
    private boolean getDRClientStatus3() {
    ClientConfig clientConfig = new ClientConfig();
    clientConfig.register(JacksonFeature.class);
        
    Client client = ClientBuilder.newClient();
    WebTarget target = client.target("http://127.0.0.1/restOnline/services/clientservice/getclientInfo"); 
    ClientQryType clientQryType = new ClientQryType();
    clientQryType.setKind(1);
    clientQryType.setRegisterId("A223982142");
        
    Invocation invocation = target.request().buildPost(Entity.entity(clientQryType, MediaType.APPLICATION_JSON_TYPE));
    GenericType genericType = new GenericType() {};
    ClientListType clientListType = invocation.invoke(genericType);
        
    logger.info("clientListType.registerId: " + clientListType.getRegisterId());  

新增的jar套件如下:

1.PNG

發表於 程式分享

Swift語法學習筆記

//
//  main.swift
//  HelloSwift
//
//  Created by grace on 2017/5/21.
//  Copyright © 2017年 grace. All rights reserved.
//

import Foundation

func func1()
{
    //1.print
    print("Hello, World!")
    
    //2.calculate
    let a = 25
    var b:Int = 3
    print(a+b)
    b += 1
    print(a+b)
    
    let doubleVal:Double = 111.11
    var varDoubleVal:Double = 22.22
    varDoubleVal += 1.1
    
    let intVal:Int = 22
    var varIntVal:Int = 21
    varIntVal += 2
    
    var sum = 0
    sum = intVal + varIntVal
    print("The sum-1 is " + String(sum))
    print("The sum-2 is \(sum)")
    print("The sum-3 is \(intVal + varIntVal)")


    var sumDouble:Double = 0.0
    sumDouble = doubleVal + varDoubleVal
    print("The sumDouble-1 is " + String(sumDouble))
    print("The sumDouble-2 is \(sumDouble)")
    print("The sumDouble-3 is \(doubleVal + varDoubleVal)")

    //3.Array
    var numbers:Array = [15, 25]
    print("numbers sum is \(numbers[0] + numbers[1])")

    //4.Dictionary
    var numberDic:Dictionary = [
        "grace": 40,
        "kevin": 42
    ]

    print((numberDic["grace"]!))
    print("grace's age is \(numberDic["grace"]!)")
    print("kevin's age is \(numberDic["kevin"])")

    //5.for
    for i in 1...10 {
        print(i)
    }

    var gradesDic = [
        "May" : 99,
        "Bob" : 59,
        "Joe" : 56
    ]

    //6.for and Dictionary
    for grade in gradesDic
    {
        if grade.1 < 60 {             print("\(grade.0)'s grade is \(grade.1)")         }     }     print((gradesDic["May"]!))     print("May's grade is \(gradesDic["May"]!)") } //7.call function with no parameter and no return func1() //8.function with return String func greet()->String {
    return "Hello"
}

var helloString = greet()
print(helloString)

//9.function with 2 input parameters
func greet2(var1:String, var2:String)->String {
    return "Hello,\(var1) and \(var2)"
}

var helloString2 = greet2(var1: "Grace", var2: "Kevin")
print(helloString2)

//10.function with return array
func getGrades()->(grade1:UInt32, grade2:UInt32, grade3:UInt32) {
    return (arc4random() % 100 + 1, arc4random() % 100 + 1, arc4random() % 100 + 1)
}

var returnArray = getGrades()
print("\(returnArray.grade1),\(returnArray.grade2),\(returnArray.grade3)")

//11.function with not quantitative parameters(不定量變數)
func sumOf(numbers:Int...)->Int {
    var sum:Int = 0
    for number in numbers {
        sum += number
    }
    
    return sum
}

print(sumOf(numbers: 1,2,3,4,5))

//12.class
class Shape {
    var name:String
    var slides:Int
    
    init(name:String, slides:Int) {
        self.name = name
        self.slides = slides
    }
    
    func simpleDescription() ->String {
        return "name is \(self.name), slides is \(self.slides)"
    }
}

var shape1:Shape = Shape(name: "shape1", slides: 4)
print(shape1.simpleDescription())

//13.inherit
class Square : Shape {
    var slideLength:Double
    
    init(name:String, sideLength:Double) {
        self.slideLength = sideLength
        super.init(name: name, slides: 4)
    }
    
    func area()->Double {
        return slideLength * slideLength
    }
    
    override func simpleDescription() -> String {
        return "A square of sideLength \(self.slideLength) which name is \(self.name), slides is \(self.slides)"
    }
}

var square1:Square = Square(name: "square1", sideLength: 5.5)
print("\(square1.name)'s area is \(square1.area()), and description is \(square1.simpleDescription()).")
發表於 程式分享

fineupload整批上傳成base64檔案

一、實作功能為: 因需將每個檔案於browser端簽章,並於server端驗章,
且需多個檔案同時上傳以取得同一批次序號

二、使用工具:
1.jquery套件fine uploader : 下載的url為https://fineuploader.com/
有API文件可參考.
2.struts2
3.Tomcat

三、基本的程式
1.browser端請直接參考https://fineuploader.com/demos.html
2.server端即為endpoint的連結

   $('#bootstrapped-fine-uploader').fineUploader({
        template: 'qq-template-bootstrap',
        request: {
            endpoint: '/server/uploads'
        }
    });

1) qqfile為傳入的檔案,型態為File,
取得檔案內容為byte[]方式如下,
我將byte[]存入MySQL資料庫mediumblob型態的欄位

   if (qqfile != null && allowedFileTypes.indexOf(sExtension.toLowerCase()) >= 0) {
        try {
            fis = new FileInputStream(qqfile);
            byte[] bFile = new byte[(int) qqfile.length()];
            fis.read(bFile);
        } catch (FileNotFoundException e) {
            logger.error(e.getStackTrace());
            message = e.getMessage();
        } catch (IOException e) {
            logger.error(e.getStackTrace());
            message = e.getMessage();
        } finally {
            try {
                if (fis != null) {
                    fis.close();
                }
            } catch (IOException e) {
                logger.error(e.getStackTrace());
            }
        }
    }

2) qqfileFileName為傳入的檔案名稱,型態為String

四、遇到的問題及解法
1.於fine uploader 如何設定不自動上傳檔案?

    $('#bootstrapped-fine-uploader').fineUploader({
        template: 'qq-template-bootstrap',
        autoUpload: false, //client端改為false,不需先上傳
        ...
    });

2.fine uploader如何不將檔案上傳至server端即顯示檔案大小?

   $('#bootstrapped-fine-uploader').fineUploader({
        ...
        callbacks: {
            ...
            onSubmitted: function(id, name) {
                var file = this.getItemByFileId(id);
                //thumbnail為file template內某個class為qq-thumbnail-selector的element
                var thumbnail = $(file).find('.qq-thumbnail-selector');                    
                //檔名
                $(thumbnail).attr('docFileName', name);                    
                //檔案大小
                var uploadSize = $(file).find('.qq-upload-size-selector');                    
                    $(uploadSize).html(formatSize(this.getSize(id)));
            },
            ...
        },
        ...
    });
    
    function formatSize(bytes){
        var sizeSymbols = ["kB", "MB", "GB", "TB", "PB", "EB"];
        var i = -1;
        do {
            bytes = bytes / 1000;
            i++;
        } while (bytes > 999);

        return Math.max(bytes, 0.1).toFixed(1) + sizeSymbols[i];
    }

3.fine uploader顯示的內容如何不顯示縮圖,即其圖檔的顯示以原圖大小顯示?

   $('#bootstrapped-fine-uploader').fineUploader({
        ...
        callbacks: {
            ...
            onSubmitted: function(id, name) {
                var file = this.getItemByFileId(id);
                //thumbnail為file template內某個class為qq-thumbnail-selector的element
                var thumbnail = $(file).find('.qq-thumbnail-selector');
                                    
                var blob = $('#bootstrapped-fine-uploader').fineUploader('getFile', id);
                var reader = new window.FileReader();
                reader.readAsDataURL(blob); 
                reader.onloadend = function() {
                    var base64data = reader.result;
                    //將src設為檔案的base64格式,若thumbnail為img,則直接顯示圖檔於browser端
                    $(thumbnail).attr('src', base64data);
                }
                ...
            },
            ...
        },
        ...
    });

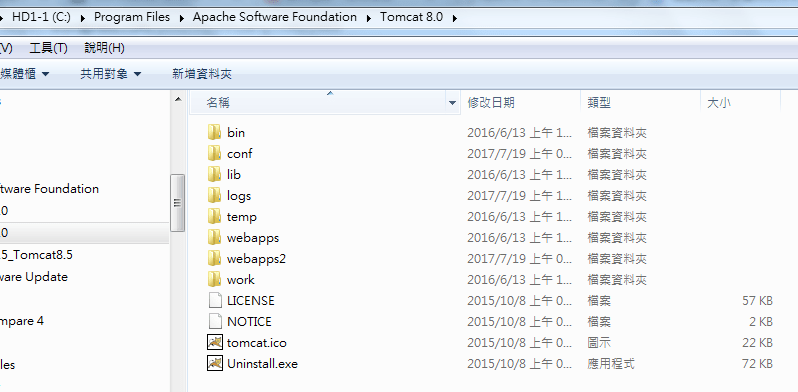
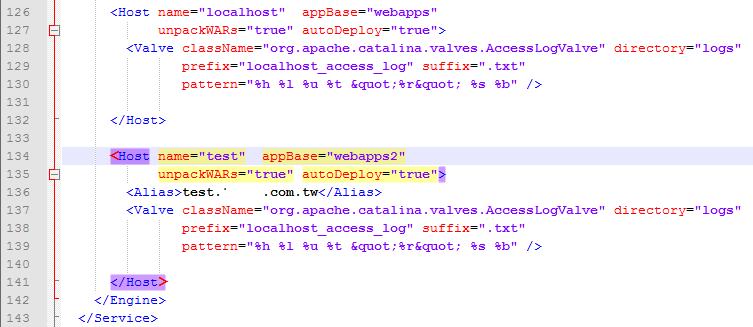
4.批次上傳檔案超過HTTP POST Limit size,如何調整Tomcat限制使其可上傳成功? (此問題是以某個變數為null呈現,其根本原因是超過HTTP POST Limit size)
於server.xml / Connector element內port="8080″內加上maxPostSize="20971520″
其中20971520 (= 20 * 1024 * 1024),即20MB,可自行調整

5.base64字串如何存入MySQL blobimage欄位?
將傳入的base64字串(String)轉成byte[]存入資料庫,Ex.base64Str.getBytes()

6.圖檔如何直接呈現於brower?
以我使用的struts套件說明如何回傳給browser端說明
1) struts.xml
<action …>

<result name$eq;"{1}" type$eq;"json">
<param name$eq;"root">dataMap</param>
</result>
</action>

2) server直接用dataMap.put將資料庫blobimage欄位取出為byte[]格式,
並回傳browser端為json格式,此json資料為int array

   private Map dataMap = new LinkedHashMap();
    ...
    //binaryStr為由MySQL blobimage欄位取得,為byte[]格式
    dataMap.put("binaryStr", binaryStr);

3) browser取得json int array的處理方式如下
myData.binarytoString(json資料為int array)取得img element src attr的內容,
即可呈現於browser端圖檔

   function binarytoString(array) {
        var result = "";
        for (var i = 0; i < array.length; i++) {
            //result += String.fromCharCode(parseInt(array[i], 2));
            result += String.fromCharCode(array[i]);
        }
        return result;
    }

7.如何將取出存成檔案於brower下載 (檔案有可能是圖檔、pdf、excel、word…) ?

   import java.io.FileOutputStream;
    import java.io.IOException;
    import java.io.OutputStream;
    import javax.xml.bind.DatatypeConverter;
    ...

    public class ShowFileAction extends BaseAction {
        private int seqno;
        
        public ShowFileAction() {
            super();
        }

        public int getSeqno() {
            return seqno;
        }
        
        public void setSeqno(int seqno) {
            this.seqno = seqno;
        }

        @Override
        public String execute() throws Exception {
            if (seqno <= 0) {
                logger.error("No Docment match");
                response.getWriter().println("No Docment match");
                return NONE;
            }
            
            //由資料庫取得base64 string,格式為byte[]
            String docType = null;
            byte[] docSrc = null;
            ...
            
            if (docSrc != null) {
                byte[] decodeBytes = docSrc;
                String base64Str = new String(docSrc);
                //截取base64Str內,以後的資料,,之前的為檔案格式內容,非檔案資料
                String tmpBase64Str = base64Str.substring(base64Str.indexOf(",") + 1);
                decodeBytes = DatatypeConverter.parseBase64Binary(tmpBase64Str);

                FileOutputStream fos = null;
                try {
                    //2.顯示檔案                
                    String docFileName = java.net.URLEncoder.encode(fileName, "UTF-8");
                    response.setHeader("Content-Disposition", "attachment;filename=".concat(docFileName));
                    response.setContentType(getContentType(docType));
                    OutputStream out = response.getOutputStream();
                    out.write(decodeBytes);
                    out.close();            
                } catch (IOException e) {
                    logger.error("seqno: " + seqno + " -- " + e.getMessage());
                    response.getWriter().println("Get Docment error");
                } finally {
                    if (fos != null)
                        fos.close();
                }   
                    
            } else {
                logger.error("No Docment - seqno: " + seqno);
                response.getWriter().println("No Docment");
            }
                
            return NONE;
        } 
        
        /**
         * 取得content Type
         * @param docType
         * @return
         */
        private static String getContentType(String docType) {
            if (docType.compareToIgnoreCase("doc") == 0 || docType.compareToIgnoreCase("docx") == 0)
                return "application/vnd.ms-word";
            else if (docType.compareToIgnoreCase("xls") == 0 || docType.compareToIgnoreCase("xlsx") == 0 ||
                    docType.compareToIgnoreCase("csv") == 0)
                return "application/vnd.ms-excel";
            else if (docType.compareToIgnoreCase("pdf") == 0)
                return "application/pdf";
            else if (docType.compareToIgnoreCase("txt") == 0)
                return "text/plain";
            else if (docType.compareToIgnoreCase("jpg") == 0 || docType.compareToIgnoreCase("jpeg") == 0)
                return "image/jpeg";
            else if (docType.compareToIgnoreCase("png") == 0)
                return "image/png";
            else if (docType.compareToIgnoreCase("gif") == 0)
                return "image/gif";
            return "application/vnd.ms-word";
        }   
    }

8.圖檔縮圖及放大呈現?
用javascript (jquery)處理

   $(document).ready(function() {
        //click 第4項產生的小圖(其設定的width較小)時觸發
        //小圖的class為sealImg
        //需注意若小圖是用javascript動態產生,需於小圖產生後再重bind此行,否則不work
        $('.sealImg').bind('click', showImgFunc);
    }); 
    
    function showImgFunc(e) {        
        e.preventDefault();
        
        var imgSrc = $(this).attr('src');        
        var htmlSrc = '';
        
        //modal是用bootstrap3產生,此處不說明
        $('#modal-body-image').html(htmlSrc);
        $('#imageModal').on('shown.bs.modal', function(e) {
                $("#messageBtn").focus();
        });  
        $('#imageModal').modal('show');
    }
發表於 程式分享

java hibernate 套件join table與sql command結果竟不相同

於java hibernate執行以下指令於t4 join結果非如預期,
理論上SELECT結果t1.date1會與t4.date1,
但結果卻不同,用command執行卻又相同~

SELECT t1.*, t2.*, t3.*, t4.*
  FROM table1 t1 
  LEFT JOIN table2 t2 
    ON t1.col1 = t2.col1 
  LEFT JOIN table3 t3 
    ON t2.col2 = t3.col2 
  LEFT JOIN table4 t4 
    ON t1.date1 = t4.date1 

Deubg許久後,想到之前有遇過SELECT t1.col1, t2.col1,
其2個值應不同,但t2.col1卻變成t1.col1之值,
因此將上述指令改成如下就OK了~

SELECT t1.*, t2.*, t3.*, t4.date1_t4
  FROM table1 t1 
  LEFT JOIN table2 t2 
    ON t1.col1 = t2.col1 
  LEFT JOIN table3 t3 
    ON t2.col2 = t3.col2 
  LEFT JOIN (SELECT date1 as date1_t4 FROM table4) t4 
    ON t1.date1 = t4.date1_t4
發表於 程式分享

java產生縮圖-為了清晰度

之前文章java產生縮圖
但清晰度不佳,又調整了一版,
清晰度變好,但檔案size也變大了~

import java.awt.Graphics2D;
import java.awt.Image;
import java.awt.Transparency;
import java.awt.image.BufferedImage;
import java.io.File;
import java.io.FileOutputStream;
import java.io.IOException;
import javax.imageio.IIOImage;
import javax.imageio.ImageIO;
import javax.imageio.ImageTypeSpecifier;
import javax.imageio.metadata.IIOMetadata;
import javax.imageio.plugins.jpeg.JPEGImageWriteParam;
import javax.imageio.stream.ImageOutputStream;
import org.w3c.dom.Element;
import org.w3c.dom.Node;
import com.sun.imageio.plugins.jpeg.JPEGImageWriter;
...

public void change2SmallImg_h(String fromImgPath, String destImgPath, String imgType, int maxHeight) {
        try {
            File fiBig = new File(fromImgPath);
            BufferedImage bis = ImageIO.read(fiBig);
            
            //原?的高?
            int w = bis.getWidth();
            int h = bis.getHeight();            
            //?放
            int nowHeight = maxHeight;
            int nowWidth = (nowHeight * w) / h;            
            changeImg(fiBig, destImgPath, imgType, nowWidth, nowHeight);
        } catch (Exception e) {
            e.printStackTrace();
        }
}
    
public void change2SmallImg_w(String fromImgPath, String destImgPath, String imgType, int maxWidth) {
        try {
            File fiBig = new File(fromImgPath);
            BufferedImage bis = ImageIO.read(fiBig);
            
            //原?的高?
            int w = bis.getWidth();
            int h = bis.getHeight();
            //?放
            int nowWidth = maxWidth;
            int nowHeight = (nowWidth * h) / w;
            changeImg(fiBig, destImgPath, imgType, nowWidth, nowHeight);
        } catch (Exception e) {
            e.printStackTrace();
        }
}
    
private boolean changeImg(File fiBig, String destImgPath, String imgType, int nowWidth, int nowHeight) {
    try {
        if (imgType.compareToIgnoreCase("png") == 0 || imgType.compareToIgnoreCase("gif") == 0){
                BufferedImage to= new BufferedImage(nowWidth, nowHeight, BufferedImage.TYPE_INT_RGB); 
                Graphics2D g2d = to.createGraphics(); 
                to = g2d.getDeviceConfiguration().createCompatibleImage(nowWidth, nowHeight, Transparency.TRANSLUCENT); 
                g2d.dispose(); 
                
                g2d = to.createGraphics(); 
                BufferedImage bis = ImageIO.read(fiBig);
                Image from = bis.getScaledInstance(nowWidth, nowHeight, Image.SCALE_AREA_AVERAGING); 
                g2d.drawImage(from, 0, 0, null);
                g2d.dispose(); 
                
                ImageIO.write(to, imgType, new File(destImgPath));
            } else {                
                BufferedImage tag = new BufferedImage(nowWidth, nowHeight, BufferedImage.TYPE_INT_RGB);
                Image img = ImageIO.read(fiBig);
                tag.getGraphics().drawImage(img.getScaledInstance(nowWidth, nowHeight, Image.SCALE_SMOOTH), 
                                            0, 0, null);
                /* only JDK 8.0,若JDK8以下,只能用下面這一段
                FileOutputStream out = new FileOutputStream(destImgPath);
                JPEGImageEncoder encoder = JPEGCodec.createJPEGEncoder(out);
                JPEGEncodeParam jep = JPEGCodec.getDefaultJPEGEncodeParam(tag);
                jep.setQuality(1f, true);
                encoder.encode(tag, jep);
                out.close();*/
                
                // Image writer
                JPEGImageWriter imageWriter = (JPEGImageWriter) ImageIO.getImageWritersBySuffix(imgType).next();
                FileOutputStream fos = new FileOutputStream(destImgPath);
                ImageOutputStream ios = ImageIO.createImageOutputStream(fos);
                imageWriter.setOutput(ios);
             
                //and metadata
                IIOMetadata imageMetaData = imageWriter.getDefaultImageMetadata(new ImageTypeSpecifier(tag), null);

                int dpi = 96;   
                //new metadata
                Element tree = (Element) imageMetaData.getAsTree("javax_imageio_jpeg_image_1.0");
                Element jfif = (Element) tree.getElementsByTagName("app0JFIF").item(0);
                for (int i = 0; i < jfif.getAttributes().getLength(); i++) {
                    Node attribute = jfif.getAttributes().item(i);
                    System.out.println(attribute.getNodeName() + "=" + attribute.getNodeValue());
                }
                jfif.setAttribute("Xdensity", Integer.toString(dpi));
                jfif.setAttribute("Ydensity", Integer.toString(dpi));
                imageMetaData.setFromTree("javax_imageio_jpeg_image_1.0", tree);

                // new Compression
                JPEGImageWriteParam jpegParams = (JPEGImageWriteParam) imageWriter.getDefaultWriteParam();
                jpegParams.setCompressionMode(JPEGImageWriteParam.MODE_EXPLICIT);
                jpegParams.setCompressionQuality(1.0f);
                
                //new Write and clean up
                imageWriter.write(imageMetaData, new IIOImage(tag, null, imageMetaData), jpegParams);
                ios.close();
                imageWriter.dispose();
            }
        return true;
    } catch (Exception e) {
            e.printStackTrace();
            return false;
        }
}
發表於 程式分享

java-透過ldap登入公司AD Server

透過ldap登入公司AD Server ,我將程式包成函數

   public boolean LDAP_AUTH_AD(String ldap_url, String sLdapdc,String username, String password) {     
        Hashtable<String, String> env = new Hashtable<String,String>();
        env.put(Context.INITIAL_CONTEXT_FACTORY, "com.sun.jndi.ldap.LdapCtxFactory");
        env.put(Context.PROVIDER_URL, ldap_url);
        env.put(Context.SECURITY_AUTHENTICATION, "simple");
        env.put(Context.SECURITY_PRINCIPAL, sLdapdc + "\\" + username);
        env.put(Context.SECURITY_CREDENTIALS, password);

        LdapContext ctx = null;
        try {
            ctx = new InitialLdapContext(env, null);
        } catch (javax.naming.AuthenticationException e) {
            this.setMessage("登入失敗- [員工編號] 或 [AD密碼] 輸入錯誤 !");
            logger.warn(username + ":登入失敗- [員工編號] 或 [AD密碼] 輸入錯誤 ! => " + e.getMessage());
            return false;
        } catch (javax.naming.CommunicationException e) {
            this.setMessage("登入失敗- 找不到認證主機 !");
            logger.error(username + ":登入失敗- 找入到認證主機 ! => " + e.getMessage());
            return false;
        } catch (Exception e) {         
            this.setMessage("登入失敗- 發生未知的錯誤,請洽系統管理員 !");
            logger.error(username + ":登入失敗- 發生未知的錯誤,請洽系統管理員 ! => " + e.getMessage());
            return false;
        } finally {
            if (ctx != null) {
                try {
                    ctx.close();
                } catch (NamingException e) {
                    logger.error(username + ":ctx.close()發生錯誤 ! => " + e.getMessage());
                } 
            }
        }   
        return true;
    }

ldap_url: 格式如ldap://localhost:389/
sLdapdc: 格式如cn=S. User, ou=NewHires, o=JNDITutorial
username: AD帳號
password: AD密碼