發表於 程式分享

apache cxf 跨域资源共享CORS問題處理

1.新增RESTCorsResponseFilter.java

import java.io.IOException;
import javax.ws.rs.container.ContainerRequestContext;
import javax.ws.rs.container.ContainerResponseContext;
import javax.ws.rs.container.ContainerResponseFilter;
import javax.ws.rs.container.PreMatching;
import javax.ws.rs.ext.Provider;
import org.apache.logging.log4j.LogManager;
import org.apache.logging.log4j.Logger;

@Provider
@PreMatching
public class RESTCorsResponseFilter implements ContainerResponseFilter {
    protected Logger logger = LogManager.getLogger(this.getClass().getName());

    @Override
    public void filter( ContainerRequestContext requestCtx, ContainerResponseContext responseCtx ) throws IOException {
        logger.info( "Executing REST response filter" );

        responseCtx.getHeaders().add( "Access-Control-Allow-Origin", "*" );
        responseCtx.getHeaders().add( "Access-Control-Allow-Credentials", "true" );
        responseCtx.getHeaders().add( "Access-Control-Allow-Methods", "GET, POST, DELETE, PUT, OPTIONS" );
        responseCtx.getHeaders().add("Access-Control-Allow-Headers", "Access-Control-Allow-Headers, Origin,Accept, X-Requested-With, Content-Type, Access-Control-Request-Method, Access-Control-Request-Headers");
    }
}

2.新增RESTCorsRequestFilter.java

import java.io.IOException;
import javax.ws.rs.container.ContainerRequestContext;
import javax.ws.rs.container.ContainerRequestFilter;
import javax.ws.rs.container.PreMatching;
import javax.ws.rs.core.Response;
import javax.ws.rs.ext.Provider;
import org.apache.logging.log4j.LogManager;
import org.apache.logging.log4j.Logger;

@Provider
@PreMatching
public class RESTCorsRequestFilter implements ContainerRequestFilter {
    protected Logger logger = LogManager.getLogger(this.getClass().getName());

    @Override
    public void filter( ContainerRequestContext requestCtx ) throws IOException {
        logger.info( "Executing REST request filter" );

        // When HttpMethod comes as OPTIONS, just acknowledge that it accepts...
        if ( requestCtx.getRequest().getMethod().equals( "OPTIONS" ) ) {
            logger.info( "HTTP Method (OPTIONS) - Detected!" );

            // Just send a OK signal back to the browser
            requestCtx.abortWith( Response.status( Response.Status.OK ).build() );
        }
    }
}

3.apache-cxf-services.xml
beans element / jaxrs:server element加上
<ref bean="RESTCorsResponseFilter" />
<ref bean="RESTCorsRequestFilter" />

beans element內加上
<bean id="RESTCorsResponseFilter" class="com.xxx.servlet.RESTCorsResponseFilter"/>
<bean id="RESTCorsRequestFilter" class="com.xxx.servlet.RESTCorsRequestFilter"/>

發表於 程式分享

ionic AES用Key加密

12/5 ionic 2 做sha256 及 base64 加密 一文使用crypto-js做sha256 及 base64 加密,
延伸說明
1.Base64解密方式

//1.sha256用key加密
let mac_data2: any = CryptoJS.HmacSHA256('AAA', 'key');
console.log('mac_data2: ' + mac_data2);     

//2.再用Base64加密
let mac_data2_base64: string = CryptoJS.enc.Base64.stringify(mac_data2);
console.log('mac_data2_base64: ' + mac_data2_base64);     

//3.Base64解密
let decrypt_base64 = CryptoJS.enc.Base64.parse(mac_data2_base64);
console.log('decrypt_base64: ' + decrypt_base64);    

2.AES加解密

//1.明文
var data = [{id: 1}, {id: 2}];

//2.AES用key加密
var ciphertext = CryptoJS.AES.encrypt(JSON.stringify(data), 'secret key 123');
console.log('ciphertext: ' + ciphertext);
    
//3.AES用key解密
var bytes  = CryptoJS.AES.decrypt(ciphertext.toString(), 'secret key 123');
console.log('bytes: ' + bytes);
    
var decryptedData = JSON.parse(bytes.toString(CryptoJS.enc.Utf8));
console.log('decryptedData: ' + decryptedData);

Ref. crypto-js

發表於 程式分享

ionic 2 動態載入iframe src – 不使用 DomSanitizer bypassSecurityTrustResourceUrl 的方式

12/3試了 ionic 2 動態載入iframe src但需要使用DomSanitizer bypassSecurityTrustResourceUrl 的方式,
今天試了另一種方式,範例如下:
1.cart.ts檔

import { Component, ViewChild, ElementRef } from '@angular/core';
import { IonicPage } from 'ionic-angular';
import { AlertController } from 'ionic-angular';
import { DomSanitizer } from '@angular/platform-browser';

@IonicPage()
@Component({
  selector: 'page-cart',
  templateUrl: 'cart.html'
})
export class CartPage {
    @ViewChild('ifr') ifr: ElementRef;
    loading: any;
    
  constructor(public alertCtrl: AlertController, private sanitizer: DomSanitizer) {
  }
  
  ionViewDidLoad() {
    this.ifr.nativeElement['src'] = 'https://warrant.xxxxx.com.tw/xxxxweb/';
    this.presentLoading();
  }
    
  presentLoading() {
    this.loading = this.alertCtrl.create({
          title: '下載中...',
          message: '測試訊息',
          buttons: [{
            text: 'Ignore',
            role: 'cancel'
          }, {
            text: 'View',
            handler: () => {
              //this.nav.push(DetailsPage, { message: '測試訊息-2' });
              console.log('測試訊息-2 handler');
            }
          }]
    });
    this.loading.present();
  }
  
  dismissLoading(){
    this.loading.dismiss();
  }
}

2.cart.html


<iframe data-tap-disabled="true" style="height:100%;width:100%;" src="https://www.xxx.com.tw/" #ifr/>
發表於 程式分享

Java開發mail寄送含附件及數位簽章

1.需先引用此3個jar檔: bcmail-jdk16-146.jar、bcprov-jdk16-146.jar、mail.jar

2.先申請mail測試憑證
同事介紹一免費憑證申請Free Email Certificate
請用IE申請(我用Chrome無法申請),申請後收到email點選確認信後,
憑證是下載到IE / 工具 / 網際網路選項 / 內容 / 憑證 / “個人"頁
找到新申請的憑證
發給欄: 為申請的email帳號,
簽發者: 為COMODO RSA Client Authentication and Secure Email CA,
請將檔案匯出成pfx檔。

3.程式碼: 為方便測試我以jsp撰寫

<%@ page language="java" contentType="text/html; charset=BIG5"
    pageEncoding="BIG5"%>
<%@ page import="java.io.*" %>
<%@ page import="java.security.*" %>
<%@ page import="java.security.cert.*" %>
<%@ page import="java.util.*" %>
<%@ page import="javax.mail.*" %>
<%@ page import="javax.mail.internet.*" %>
<%@ page import="org.bouncycastle.mail.smime.*" %>
<%@ page import="javax.activation.*" %>
<%
    //1.讀取pfx檔
    KeyStore keyStore = KeyStore.getInstance("PKCS12");   
    //請將匯出的pfx檔放至與jsp檔案同一路徑
    String pfxFilePath = application.getRealPath("/test.pfx");    
    FileInputStream fis = new FileInputStream(pfxFilePath); 
    //xxxxxx請用pfx檔匯出時儲存的密碼
    char[] key = "xxxxxx".toCharArray();
    keyStore.load( (InputStream) fis, key);
    Enumeration e = keyStore.aliases();
    String alias = (String) e.nextElement();    
    PrivateKey pk = (PrivateKey) keyStore.getKey(alias, key);   
    X509Certificate pkcs12Cert = (X509Certificate) keyStore.getCertificate(alias);  
    SMIMESignedGenerator gen = new SMIMESignedGenerator();  
    gen.addSigner(pk, pkcs12Cert, SMIMESignedGenerator.DIGEST_SHA1);
    
    //2.email 內容
    MimeBodyPart msg = new MimeBodyPart();
    
    MimeBodyPart mbp1 = new MimeBodyPart();
    String message = "這是測試資料.";
    mbp1.setContent(message.toString(), "text/html; charset=big5");
    
    Multipart mp = new MimeMultipart();
    mp.addBodyPart(mbp1);
    
    //3.email 附檔
    MimeBodyPart messageBodyPart = new MimeBodyPart();
    String attachFile = "下載.png";
    String attachPath = application.getRealPath("/" + attachFile);
    DataSource source = new FileDataSource(attachPath);
    messageBodyPart.setDataHandler(new DataHandler(source));
    messageBodyPart.setFileName(MimeUtility.encodeText(attachFile, "BIG5", "B"));
    mp.addBodyPart(messageBodyPart);

    msg.setContent(mp); 

    //4.以pfx簽 email 內容 及 email 附檔
    MimeMultipart mm = gen.generate(msg, new org.bouncycastle.jce.provider.BouncyCastleProvider ());
    
    Properties props = System.getProperties();
    props.put("mail.smtp.host", "webmail.xxx.com.tw");
    Session mailSession = Session.getDefaultInstance(props, null);
    
    //5.設定寄件者及收件者
    MimeMessage body = new MimeMessage(mailSession);
    InternetAddress fromUser = new InternetAddress("service@xxx.com.tw");
    fromUser.setPersonal("測試人員", "big5");
    body.setFrom(fromUser);
    
    String contact = "user1@xxx.com.tw, user2@xxx.com.tw, user3@xxx.com.tw";
    body.setRecipients(Message.RecipientType.TO, InternetAddress.parse(contact.trim()));
    
    //6.設定標題、內文
    body.setSubject("Signed message 範例" ,"big5");
    body.setHeader("X-Mailer", "Java mailer"); 
    body.setContent(mm, mm.getContentType());
    
    body.saveChanges();
    
    //7.傳送
    Transport.send(body);
%>

4.傳送結果
1

發表於 程式分享

ionic 2 做sha256 及 base64 加密

1.npm install crypto-js

2.程式碼

import { Component } from '@angular/core';
import { IonicPage, MenuController, NavController } from 'ionic-angular';
import * as CryptoJS from 'crypto-js';

@IonicPage()
@Component({
  selector: 'page-tutorial',
  templateUrl: 'tutorial.html'
})
export class TutorialPage {
  constructor(public navCtrl: NavController, public menu: MenuController) {
  }

  ionViewDidEnter() {
    let mac_data2: any = CryptoJS.HmacSHA256('AAA', 'key');
    console.log('mac_data2: ' + mac_data2);
  }
}

3.執行結果

mac_data2: c23468514f9dfea9647435df6924436cb3833bfc3d5b5d4e9a129f410ca0e408

4.驗證畫面
連至jsSHA
1

Ref.JWT 認證在 RESTful service 上的應用 (3) – Angular

發表於 程式分享

ionic2 讀取 server json資料,並轉換成QRCode供使用者掃描

1.json資料

[
    {
        "Id": 1,
        "ShopId": "BS042",
        "Active": 1,
        "Description": "這是第一筆最新訊息-for BS042特店",
        "ModifyDateTime": "2017-11-26T10:41:47",
        "UserAcct": null,
        "UserStatus": 0,
        "Image": "https://www.xxx.com.tw/testWeb/img/img2.png"
    },
    {
        "Id": 2,
        "ShopId": "BS042",
        "Active": 1,
        "Description": "這是第2筆最新訊息-for BS042特店",
        "ModifyDateTime": "2017-11-26T10:41:33",
        "UserAcct": null,
        "UserStatus": 0,
        "Image": "https://www.xxx.com.tw/testWeb/img/img2.png"
    }
]

2.讀取server json資料
檔名: list-master.ts

import { Component } from '@angular/core';
import { IonicPage, ModalController, NavController } from 'ionic-angular';
import { Item } from '../../models/item';
import { Items } from '../../providers/providers';
import { Api } from '../../providers/providers';

@IonicPage()
@Component({
  selector: 'page-list-master',
  templateUrl: 'list-master.html'
})
export class ListMasterPage {
  currentNews: Item[];

  constructor(public navCtrl: NavController, public items: Items, public modalCtrl: ModalController,
    private api: Api) {
    this.currentItems = this.items.query();
    
    let postParams = {
      ShopId : 'BS042',
      UserAcct : 'grace',
      Lang : 'zh'
    }
    let seq = this.api.post('getReq.jsp', postParams).share();
    seq.subscribe((res: any) => {
        this.currentNews = res;        
    }, err => {
        console.error('ERROR', err);
    });
  }
  
  openNews(item: Item) {
    this.navCtrl.push('QrcodePage', {
      item: item
    });
  }
}

3.顯示json資料
檔名: list-master.html

  
<ion-header>
  <ion-navbar>
    <ion-title>最新消息</ion-title>
  </ion-navbar>
</ion-header>

<ion-content>
  <ion-list>
    <ion-item-sliding *ngFor="let item of currentNews">
      <button ion-item (click)="openNews(item)">
        <ion-avatar item-start>
          <img [src]="item.Image" />
        </ion-avatar>
        <h2>{{item.Description}}</h2>
        <p>{{item.Active}}</p>
        <ion-note item-end *ngIf="item.UserStatus">{{item.UserStatus}}</ion-note>
      </button>
    </ion-item-sliding>
  </ion-list>
</ion-content>

1.PNG

4.顯示QRCode碼
檔名: qrcode.ts

import { Component } from '@angular/core';
import { IonicPage, NavController, NavParams } from 'ionic-angular';
import { QRScanner, QRScannerStatus } from '@ionic-native/qr-scanner';

@IonicPage()
@Component({
  selector: 'page-qrcode',
  templateUrl: 'qrcode.html'
})
export class QrcodePage {
  encodeData2 : string = '';
  
  constructor(public navCtrl: NavController, public navParams: NavParams, private qrScanner: QRScanner) {
    if (navParams.get('item')) {
        let item = navParams.get('item');
        this.encodeData2 = 'Id=' + item.Id + '&ShopId=' + item.ShopId + '&UserAcct=' + 'grace';
    }
  }
}

檔名: qrcode.html

 
<ion-header>
 <ion-navbar>
     <ion-title text-center>QRCode</ion-title>
 </ion-navbar>
</ion-header>
<ion-content padding>
   <ion-card>
        <ion-card-header class="text-c">
            <ion-input type="text" [(ngModel)]="encodeData2" name="encodeData2" placeholder="請輸入QRCode"></ion-input>
        </ion-card-header>
        <ion-card>
            <qrcode [qrdata]="encodeData2" [size]="256" [level]="'M'"></qrcode>
        </ion-card>
    </ion-card>
</ion-content>

2

發表於 程式分享

ionic 2 動態載入iframe src

1.最先遇到的問題是caused by: unsafe value used in a resource URL context,其解法為加上DomSanitizer 解析 url
cart.ts檔

import { Component } from '@angular/core';
import { IonicPage, NavController, NavParams, Loading, LoadingController } from 'ionic-angular';
import { DomSanitizer } from '@angular/platform-browser';
import { User } from '../../providers/providers';

@IonicPage()
@Component({
  selector: 'page-cart',
  templateUrl: 'cart.html',
})
export class CartPage {
    private webUrl : any;
    loading: Loading;

    constructor(public navCtrl: NavController, public navParams: NavParams,
        private user: User, private sanitizer: DomSanitizer,
        public loadingCtrl: LoadingController) {        
        this.webUrl = this.sanitizer.bypassSecurityTrustResourceUrl(this.user._user.shopItem.WebUrl);
    }

    ionViewWillEnter(): void {
        this.loading = this.loadingCtrl.create({
            content: 'Please wait...'
        });

        this.loading.present();
    }

    handleIFrameLoadEvent(): void {
        this.loading.dismiss();
    }
}

html檔:


2.而後遇到page需load兩次才能正常顯示畫面,查了許久,發現因是放在 <ion-tab> 的第二個,但其原本預設的root 非 CartPage,調整後就好了

發表於 程式分享

ionic FCM for iOS開發版上架流程

1.申請Apple Developer Account
登入https://developer.apple.com/
需要登記Apple Developer Program,年費為99美元,要擁有付費開發者帳戶,才可使用其推播功能。

2.於Mac機器產生 CSR 檔
開啟鑰匙圈存取: 開啟Spotlight後,輸入keychain Access.
=> 於menu選單點選Keychain Access
=> 點選 “Certificate Assistant"(憑證輔助程式) 選單
=> 點選 “Request a Certificate From a Certificate Authority…"(從憑證授權要求憑證…)
=> 出現 “Certificate Assistant" 視窗
=> 填上自己的 Email 及 名字 並選 “Saved to Disk" 後,
再點選 “Continue" Button產生CSR檔(檔名為CertificateSigningRequest.certSigningRequest)

3.設定Apple Developer Account
點選左方選單 “Certificates, IDs & Profiles"
=> 點選左方選單 “Identifiers"
=> 點選 “Identifiers" 選單下的 “App IDs" 選單
=> 點選 “iOS App IDs" 頁面右上角 + 按鈕
=> 進入 “Register iOS App ID"頁面,填上如下資料
1) App ID Description—?Name:
填入App名稱(Ex.QRCode測試專案App).
2) App ID Suffix?—?Explicit App ID?—?Bundle ID:
即App的Bundle Identifier(如:com.xxx.test.qrcodedemo).
=> 於App Services內,點選 “Push Notification"
=> 頁面連結至 “Confirm your App ID" 頁面, 請按 “Register"
=> 於 “iOS App IDs" 頁面,點選剛建立的App ID,
看到Application Services的功能選項,請點選最下方的 “Edit" 按鈕
=> 於 “iOS App Settings" 頁面,點選 “Push Notifications"選項
=> 建立 “Client SSL Certificate"以使用 Firebase Server 連接到Apple Push Notification Services.
因為目前是在開發階段,故於Development SSL Certificate內 點選”Create Certificate…”按鈕.

4.上傳 CSR 檔 以 下載 iOS憑證 for Push Services
接續第3項操作於 “Add iOS Certificate" 頁面
=> 點選 “Continue" 按鈕
=> 點選 “Choose file…", 上傳第2項產生的CSR檔, 按 “Open"按鈕.
=> 按 “Continue" 按鈕, 顯示 “Your Cerificate is ready" 頁面
=> 按 “Download" 按鈕下載 iOS憑證 for Push Services (檔名預設應該是aps_development.cer)

5.準備 APNs(Apple Push Notifications) 憑證 (p12檔)
點選兩下第5項產生的認證檔案(aps_development.cer)以加入到鑰匙圈存取(Keychain Access).
=> 開啟 “鑰匙圈存取頁面", 於 “我的憑證"(My Certificates), 可查詢剛加入的認證檔,
應為:Apple Development IOS Push Services:
=> 認證檔檔名左邊有一個展開箭頭,
點選展開後,有一個屬性(應為第2項輸入的名字),
點選後,按右鍵,再按 “export" Button.
=> “是否要儲存你的private key為p12檔" 確認視窗跳出
=> 按 “儲存" 按鈕後
=> 若想保護你輸出後的認證, 可輸入密碼來保護它,
再點選 “OK" 按鈕,即產生p12檔

5.申請 FCM 帳號
登入 https://firebase.google.com/ 進入控制台(console)
=> 點選 “CREATE NEW PROJECT" 按鈕
=> 設定 Project Name 及 Country region
=> 進入 Project, 點選 “Add Firebase to your iOS" 按鈕,
輸入你的iOS bundle ID (需與XCode Project同), 再點選 “ADD APP" 按鈕
=> 下載 GoogleService-Info.plist 檔
=> 點選 “CONTINUE" 按鈕, 現在請先忽略它, 按下 “CONTINUE" 按鈕
=> 點選 “Finish" 按鈕, 顯示 iOS App Firebase 頁面.
Ref.申請FCM推播帳號

6.Firebase 推播設定
iOS App Firebase 頁面
=> 頁面左上角Setting icon, 點選 settings icon, 再點選 Project settings
=> 選取頁籤 “Cloud Messaging"
=> 點選 “Upload Certificate" 按鈕
=> 出現 “Upload your Development APNs certificate" 頁面,
點選 “BROWSE" 上傳第5項產生之p12檔, 若先前有設定密碼也請一併輸入
=> 顯示結果: Development APNs certificate 已存入Cloud Messaging setting內

7.Firebase推播功能的Demo App
1) 我是用ionic開發, FCM於ionic引用方式請參考:           https://ionicframework.com/docs/native/fcm/.
2) build成上架程式有遇的問題處理方式: 可參考ionic 2 (from Visual Studio) build iphone/ipad遇到問題
上架的方式請參考iPhone/iPad開發實機測試及上架練習筆記iTunes Connect通知外部人員測試 App- TestFlight初體驗
3) 此次上傳程式至iTunes收到apple通知信有如下3問題


Dear developer,
We have discovered one or more issues with your recent delivery for "[Project Name]". To process your delivery, the following issues must be corrected: 
Missing Info.plist key - This app attempts to access privacy-sensitive data without a usage description. The app's Info.plist must contain an NSCameraUsageDescription key with a string value explaining to the user how the app uses this data. 
Though you are not required to fix the following issues, we wanted to make you aware of them:
Missing App Store Icon - iOS Apps must include a 1024x1024px App Store Icon in PNG format. Without providing the icon in the Asset Catalog or via iTunes Connect, apps cannot be submitted for App Review or Beta App Review. Refer to https://developer.apple.com/ios/human-interface-guidelines/icons-and-images/app-icon/ for more information. 
Missing Push Notification Entitlement - Your app appears to register with the Apple Push Notification service, but the app signature's entitlements do not include the "aps-environment" entitlement. If your app uses the Apple Push Notification service, make sure your App ID is enabled for Push Notification in the Provisioning Portal, and resubmit after signing your app with a Distribution provisioning profile that includes the "aps-environment" entitlement. Xcode 8 does not automatically copy the aps-environment entitlement from provisioning profiles at build time. This behavior is intentional. To use this entitlement, either enable Push Notifications in the project editor's Capabilities pane, or manually add the entitlement to your entitlements file. For more information, see https://developer.apple.com/library/content/documentation/NetworkingInternet/Conceptual/RemoteNotificationsPG/HandlingRemoteNotifications.html#//apple_ref/doc/uid/TP40008194-CH6-SW1. 
Once the required corrections have been made, you can then redeliver the corrected binary. 
Regards,
The App Store team

4) Missing App Store Icon 解法說明
先直接於Xcode內調整:
先產生1張1024×1024 icon (png檔)
=> 於Xcode project 選取 Images.xcassets,
=> 點選 AppIcon 項次, 將1024×1024 icon (png檔)拉入2處 App Store iOS 1024pt

有找到 ionic 專案內應該是於config.xml 的
      新增
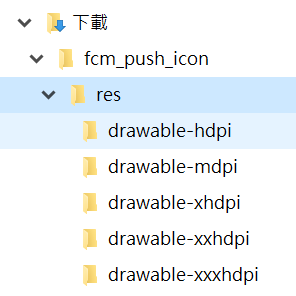
      及將1024×1024 icon (png檔)放入對應目錄 => 此項還待驗證中

5) Missing Info.plist key 解法說明
      因為顯示的是 NSCameraUsageDescription key with a string value explaining to the user how the app uses this data,
      即因有使用攝影機功能, 故需加註說明於
      先直接於Xcode plist內調整: (info.plist加上Privacy Camera Usage Description)
      Info頁
      => Custom iOS Target Properties
      => 新增如下說明 (說明也可用中文字)

Key    :  Privacy - Camera Usage Description   
Value  :  $(PRODUCT_NAME) camera use

      Ref.https://stackoverflow.com/questions/39465687/nscamerausagedescription-in-ios-10-0-runtime-crash
iOS 10 存取使用者私密資料都要加上 usage description

6) Missing Push Notification Entitlement 解法說明
a.GoogleService-Info.plist需在XCode project folder內,
      之前遇到ionic build後會變空檔, 處理方式可參考ionic 2 (from Visual Studio) build iphone/ipad遇到問題.
b.在Xcode project navigation內找到Project (info.plist),
      選取 Target => Capabilities => 開啟 Push Notification (狀態需為 ON)

Ref.Missing Push Notification Entitlement warning
IOS上架提交審核遇到Missing Push Notification Entitlement的問題
Generate an iOS Push Certificate

8.測試Firebase推播功能
Firebase Console, 選擇Firebase Project, 於左側選單選擇 Notification,
      => 於 Notification 頁面 點選 “SEND YOUR FIRST MESSAGE" 按鈕
      => 可開始輸入選項進行測試

Ref.Push Notification教學:如何使用Firebase在iOS實現推播功能
Firebase Cloud Messaging (FCM)

發表於 程式分享

ionic 2 FCM Notification icon (android) 如何設定

1.將1024 * 1024 png檔透過去背功能後,上傳至http://romannurik.github.io/AndroidAssetStudio/icons-notification.html
其中Trim whitespace請用Don’t trim
Padding用0%
Name用fcm_push_icon
1
下載檔案請解壓縮後放至[Project name]\platforms\android\res各相對應目錄
1
PS.目前還未找到如何在ionic專案先設定,故先於platforms\android路徑存放這些png檔

2.此項有做,但尚不確定是否需做~~先記錄
於config.xml加入(會產生至[Project Name]\platforms\android\res\xml\config.xml)


        <icon density="ldpi" src="resources/android/fcm_push_icon/drawable-ldpi-fcm_push_icon.png" />
        <icon density="mdpi" src="resources/android/fcm_push_icon/drawable-mdpi-fcm_push_icon.png" />
        <icon density="hdpi" src="resources/android/fcm_push_icon/drawable-hdpi-fcm_push_icon.png" />
        <icon density="xhdpi" src="resources/android/fcm_push_icon/drawable-xhdpi-fcm_push_icon.png" />
        <icon density="xxhdpi" src="resources/android/fcm_push_icon/drawable-xxhdpi-fcm_push_icon.png" />
        <icon density="xxxhdpi" src="resources/android/fcm_push_icon/drawable-xxxhdpi-fcm_push_icon.png" />

3.設定icon為fcm_push_icon即指項app內的resource,color則是設定icon之顏色


string deviceId = "/topics/marketing";
var data = new
{
        to = deviceId,
        notification = new
        {
              body = message,
              title = title,
              sound = "Enabled",
              icon = "fcm_push_icon",
              color = "#FF0000"
         }
};
var serializer = new JavaScriptSerializer();
var json = serializer.Serialize(data);
logger.Info("json: " + json);
Byte[] byteArray = Encoding.UTF8.GetBytes(json);
tRequest.ContentLength = byteArray.Length;
發表於 程式分享

ionic 2 (from Visual Studio) build iphone/ipad遇到問題

1.Visual studio remote build出現VcTac System.IO.PathTooLongException
目前找到的解法就是於windows只支援248bytes的路徑名稱及260bytes的檔案名稱,
只好將Visual studio專案移至近根目錄

直接用XCode Debug遇到如下問題:
2.invalid GOOGLE_APP_ID in GoogleService-Info.plist or set in the customized options
GoogleService-Info.plist於ionic2 (in Visual Studio)是由https://console.firebase.google.com設定iOS應用程式後下載的,但build ios時不知何原因未正確copy,致專案未能執行,故再重新複製至
/Users/[macbook user name]/.taco_home/remote-builds/taco-remote/builds/720/cordovaApp/platforms/ios/[project name]/Resources

3.CDV plugin not exist
/Users/[macbook user name]/.taco_home/remote-builds/taco-remote/builds/720/cordovaApp/platforms/ios/[project name]/config.xml widget element新增

  <feature name="StatusBar">
 <param name="ios-package" value="CDVStatusBar" />
 <param name="onload" value="true" />
 </feature>
 <feature name="FCMPlugin">
 <param name="ios-package" value="FCMPlugin"/>
 </feature>
 <feature name="Device">
 <param name="ios-package" value="CDVDevice"/>
 </feature>
 <feature name="Console">
 <param name="ios-package" value="CDVLogger" />
 </feature>
 <feature name="BarcodeScanner">
 <param name="ios-package" value="CDVBarcodeScanner" />
 </feature>
 <feature name="SplashScreen">
 <param name="ios-package" value="CDVSplashScreen" />
 </feature>
 <feature name="Badge">
 <param name="ios-package" value="APPBadge"/>
 </feature>