有人曾在GAE建立監控程式,藉此監控公司的網站等服務是否可正常由外部網路使用,

是個不錯的應用,大家可以參考看看~

1.先至google console建立專案,請記錄專案ID

https://console.cloud.google.com/

螢幕快照 2016-04-21 上午1.27.05.png

2.可參考下載App engine資訊主頁相關說明

下載eclipse,並加裝google app engine SDK或使用plugin,

我使用的plugin路徑∶https://dl.google.com/eclipse/plugin/core/4.3

螢幕快照 2016-04-21 上午1.29.09.png

螢幕快照 2016-04-21 上午1.32.02.png

螢幕快照 2016-04-21 上午1.32.41.png

3.開發好程式,測試方式

1) 選 Run As “Web Application"

螢幕快照 2016-04-21 上午1.38.52.png

螢幕快照 2016-04-21 上午1.39.55.png

2) 於瀏覽器中 輸入http://localhost:8888 可驗證結果

螢幕快照 2016-04-21 上午1.41.08.png

4.compile project

螢幕快照 2016-04-21 上午1.43.14.png

5.deploy project到google cloud的app engine

螢幕快照 2016-04-21 上午1.43.44.png

請點選App Engine project settings設定完成後,再執行"Deploy" Button

螢幕快照 2016-04-21 上午1.46.30.png

Application ID請填入步驟1取得的專案ID,按 “OK" Button回到上一頁

螢幕快照 2016-04-21 上午1.45.55.png

6.輸入https://[專案ID].appspot.com/

Ex.https://helical-rhythm-750.appspot.com/

即可顯示上傳專案的畫面

螢幕快照 2016-04-21 上午1.53.39.png

7.可至google cloud platform查詢app engine的使用狀況

螢幕快照 2016-04-21 上午1.30.05.png

螢幕快照 2016-04-21 上午1.55.33.png


如何建立google app engine(Java)程式,並上版到google雲端

想要在自已的網站或blog設定只搜尋特定網址的搜尋結果,可試看看這個~

1.登入google自訂搜尋網頁

https://cse.google.com/cse/all

2.新增搜尋引擎

1) 輸入要搜尋的網站∶可多個

2) 選擇語言及搜尋引擎的名稱

螢幕快照 2016-04-21 上午12.31.15.png

3.新增後可選擇編輯搜尋引擎,可調整相關設定

螢幕快照 2016-04-21 上午12.35.41.png

4.於"外觀和風格" => “版面配置" => 點選"儲存並取得程式碼"

螢幕快照 2016-04-21 上午12.48.09.png

螢幕快照 2016-04-21 上午12.50.30.png

點"取得V1程式碼"可取得進階功能

螢幕快照 2016-04-21 上午12.51.48.png

5.登入google blogger => 版面配置 => 新增小工具 => 選"HTML/JavaScript"將步驟4取得的指令貼上

螢幕快照 2016-04-21 上午12.55.01.png

6.於blogger頁面輸入搜尋關鍵字,就會跳出只有我們限定網址內的查詢結果了。

螢幕快照 2016-04-21 上午12.58.14.png

螢幕快照 2016-04-21 上午12.59.38.png

7.若不想有廣告資訊則可在企業項次,選則付費。

螢幕快照 2016-04-21 上午1.03.43.png

8.統計資訊

螢幕快照 2016-04-21 上午1.15.20.png

如何自訂google搜尋引擎並加在google-blogger

1.登入google API管理員

https://console.developers.google.com

1) 啟用google blog API

1.GIF

2) 申請OAuth 2.0用戶端ID 憑證

請記得設定授權的JavaScript來源 (因為是透過JavaScript),故請設定執行的server ip / domain (PS.localhost是我為了測試用,正式需拿掉)

請記錄用戶端ID,此即後續開發會用到的client ID

1

3) 申請API金鑰 憑證

請記得設定接受這些HTTP參照網址(網站)發出的要求 (因為是透過JavaScript),故請設定執行的server ip / domain (PS.localhost是我為了測試用,正式需拿掉)

請記錄API金鑰,此即後續開發會用到的API Key

1.GIF

2.請於初始時引用google api client javascript

 https://apis.google.com/js/client.js?onload=init

3.檢核授權狀況
1) 授權button : Ex.id用authorize-button,已授權則會隱藏,未授權則需點選並確認授權,方可上傳文章,授權頁面如下

1.GIF
2) 上傳文章button : Ex.id用addPostButton

上傳文章後會顯示如下訊息框

1.GIF

3) javascript如下

function init() {
    gapi.client.setApiKey(googleBlog.apiKey);
    window.setTimeout(googleBlog.checkAuth,1);
     
    gapi.client.load('blogger', 'v3', function() {      
        $("#addPostButton").click(googleBlog.addPost);      
    });
}       

var googleBlog = {
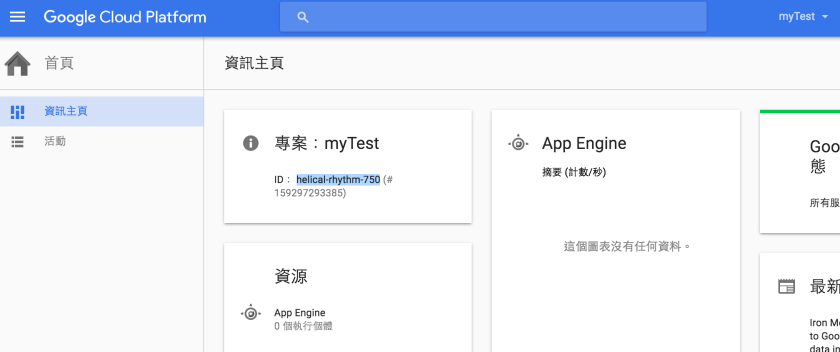
    blogId : '{請用您的Blog ID}',
    clientId : '{請用剛申請的Client ID}',
    apiKey : '{請用剛申請的API Key}',
    scopes : 'https://www.googleapis.com/auth/blogger',
    
    checkAuth : function () {
        gapi.auth.authorize({client_id: googleBlog.clientId, scope: googleBlog.scopes, immediate: true}, 
                googleBlog.handleAuthResult);
    },
    handleAuthResult : function (authResult) {
        var authorizeButton = document.getElementById('authorize-button');
        if (authResult && !authResult.error) {
            authorizeButton.style.visibility = 'hidden';
            //makeApiCall();
        } else {
            authorizeButton.style.visibility = '';
            authorizeButton.onclick = googleBlog.handleAuthClick;
        }
    },
    handleAuthClick : function (event) {
         // 步驟3: 通過授權以存取資料
         gapi.auth.authorize({client_id: googleBlog.clientId, scope: googleBlog.scopes, 
             immediate: false}, googleBlog.handleAuthResult);
        return false;
    },
    addPost : function(event) {
        event.preventDefault();
        
        var blogIdVal = googleBlog.blogId;              
        var blogTitle = $('input[name=blogTitle]').val();
        
        var blogContent = tinyMCE.get('blog_content').getContent({format : 'raw'});
        blogContent = blogContent.replace(/(?:\r\n|\r|\n)/g, '');
        blogContent = parseHTML(blogContent).getElementsByTagName('body')[0].innerHTML;             
        var save_data = JSON.stringify(blogContent); //以JSON字串存入
            
        var formData = {'blogId': blogIdVal, fetchBody : true, fetchImages : true,
            isDraft : true, 'title': blogTitle,'content':save_data};
        var request = gapi.client.blogger.posts.insert(formData);
        request.execute(function(response) {
            console.log(response);
            if (response.id) {
                $('#modal-body-msg').text("文章上傳至google blog完成(草稿),文章編號:" + response.id);
                $('#messageModal').modal('show');    
            } else {
                $('#modal-body-msg').text("文章上傳至google blog失敗");
                $('#messageModal').modal('show');
            }
        });  
    }
}

上傳文章,我將其預設值用成"草稿",須按"發佈"Button後才會對外發佈

1.GIF

將文章透過google api上傳至google blog

1.請先依此篇文章設定google blooger的rss至feedburner
https://myyhhuang.wordpress.com/2016/03/14/使用google-feedburner/
Ex.http://xxx.blogspot.com/  則設定為  http://xxx.blogspot.com/feeds/posts/default

2.在Feedburner => Publicize => Email Subscriptions 選取啟用鈕後會出現如下畫面1.png

3.往下,看到如下畫面,選取Blogger,按"Go!"鈕

1.GIF

4.至google blogger設定畫面

1

5.點選HTML/JavaScript小工具,出現如下畫面,標題請自行輸入,內容則請將步驟3上面的方框整塊複製過來

1.GIF

6.google blogger 儲存排列方式後,至blogger 頁面則可看到email訂閱畫面

1.GIF

訂閱後,會收到如下的確認信,點選後可啟用

1

7.訂閱後,可在Feedburner => Publicize => Email Subscriptions => Subscription Management下方查詢到訂閱者的資料

1.GIF

google blogger使用feedburner搜集客戶email

今天查一個登入問題:若前一次有按正常程序登出,停留在登出畫面,重啟tomcat後,
再重新登入,有查到struts action程式有登入成功,且導至登入成功的第一頁,
但是用struts的tag #session判斷是否有session,其session竟然是null,
後來只好改寫成如下再觀察看看:

   System.out.println("jsp session id : " + session.getId());
    UserItem userItem = (UserItem) session.getAttribute("UserItem");
    if (userItem == null)
        response.sendRedirect("logout.action");
    else //雖然這樣的寫法很怪,但若沒這樣寫,前一次tomcat重啟後(或server session失效),重登後用struts2的tag取#session.UserItem就會取不到,但寫一次就OK
        session.setAttribute("UserItem",userItem);

struts2 session判斷問題

在MySQL新增trigger時,出現如下錯誤訊息

ERROR 1064 (42000): You have an error in your SQL syntax; check the manual that corresponds to your MySQL server version for the right

試了很久,發現CREATE TRIGGER指令的內容,不可以含Tab值,刪除後就好了。

DROP TRIGGER IF EXISTS FTStrategyInsert;

delimiter |

CREATE TRIGGER FTStrategyInsert AFTER INSERT ON FTStrategy
FOR EACH ROW
BEGIN
INSERT INTO FTStrategyLog
SET StryId = New.StryId,
StryName = New.StryName,
MktRiskAuth = New.MktRiskAuth,
TRoleId = New.TRoleId,
TAcctId = New.TAcctId,
StartDate = New.StartDate,
EndDate = New.EndDate,
Content = New.Content,
ModifyTime = New.ModifyTime,
ModifyEmp = New.ModifyEmp,
ModifyType = 'Insert';
END;
|

delimiter ;

select * from information_schema.triggers where trigger_name='FTStrategyInsert';

MySQL新增trigger失敗-ERROR 1064 (42000)

昨日使用full calendar套件時,在每日均加上checkbox做假日檔的設定,

並加上週六日直接預設為假日,在正常操作下均無誤,

但因為設定的假日檔有多種類型,當切換不同類型時設定週六日為假日竟然失效,

試了2、3小時找到原因,因為我在切換checked時是用

$(_cell).attr(‘checked’, true);

調為

$(_cell).prop(‘checked’, true);

就一切正常了!

jquery checkbox checked切換

請參考以下範例

1.enum宣告

package com.test.constants;
public enum PlatForm {
    PRIVADM {
          public String toString() {
              return "PRIVADM";
          }
      },
      WARRANTADM {
          public String toString() {
              return "WARRANTADM";
          }
      }
}

2.jsp struts2 tag使用

<struts:set name="MYPLATFORMID" value="@com.test.constants.PlatForm@PRIVADM"/>

Java enum如何於struts2 tag使用

1.下載套件
http://fullcalendar.io/download/

2.安裝套件
1) css : fullcalendar.css
2) js :fullcalendar.js

3.html tag

4.javascript設定

var myCalendar = {
   init : function() {
      var calendar = $('#calendar').fullCalendar({
         viewRender: function(view, element){
            myCalendar.getData();
         },
         header: {
            left: 'prev, today',
            center: 'title',
            right: 'next'
         },
         defaultView: 'month',
         selectable: true,
         selectHelper: true,
         eventRender: function (event, element, icon) {
            if (event.description != "") {
               element.attr('title', event.description);
            }
            element.css('cursor', 'pointer');
            element.css('background-color', '#FFB347');
            element.css('color', '#000000');
         },
         eventClick: function(calEvent, jsEvent, view) {
            document.location.href = "blog" + calEvent._id + ".action";
         },
      });
   },
   getData : function() {
      var curDate = $('#calendar').fullCalendar('getDate');
      var year = moment(curDate).format('YYYY');
      var mon = moment(curDate).format('MM');

      var formData = {year : year, mon : mon};
      $.ajax({
         url : 'waBloggetCalendar.action',
         type: "POST",
         data : formData,
         success : myCalendar.ajax_loaddata,
         error : function(xhr, statusText, error) {
            myMessageModal.popup("訊息通知","錯誤! 無法取得資料.");
         }
      });
   },
   ajax_loaddata : function(data) {
      $.each(data, function(index, item){
         if (index == "result") {
            if (item.success == false) {
               myMessageModal.popup("訊息通知",item.message);
            }
         } else if (index == "WABlogItemList"){
            var myseries = [];
            $.each(item, function(index2, item2) {
               myseries.push(item2);
            });
            $('#calendar').fullCalendar('removeEvents');
            $('#calendar').fullCalendar('addEventSource', myseries);
            $('#calendar').fullCalendar('rerenderEvents');
         }
      });
   }
}

5.javascript 初始化

$(document).ready(function() {
   $('#calendar').css('min-height', 400);
   $.getScript('assets/js/fullcalendar.js', myCalendar.init);
});

6.回傳之JSON資料如下
1.GIF
7.成果如下
1.GIF

如何使用full calendar套件做網頁日曆

1.下載library : commons-digester-rss.jar (http://www.java2s.com/Code/Jar/c/Downloadcommonsdigesterrssjar.htm)

2.import
import org.apache.commons.digester.rss.Channel;
import org.apache.commons.digester.rss.Item;

3.範例

SimpleDateFormat formatter= new SimpleDateFormat("dd MMM yyyy HH:mm:ss Z"); 
String today = formatter.format(new Date()); 
Channel newChannel = new Channel(); 
newChannel.setCopyright("© 2010 XXX Co., Ltd. All Rights Reserved.");
newChannel.setDescription("Grace's Blog"); newChannel.setLink("http://www.xxx.com/"); 
newChannel.setLanguage("zh-TW"); 
newChannel.setPubDate(today); 
for (tmpItem......) { 
      Item item = new Item(); 
      item.setTitle(tmpItem.getTitle()); 
      item.setLink(request.getScheme() + "://" + request.getServerName() +    request.getContextPath() + "/blog" + tmpItem.getBlogId() + ".action");
      item.setDescription(tmpItem.getSlogan()); 
      String pusDate = formatter.format(tmpItem.getModifyTime());
      newChannel.setPubDate(pusDate); newChannel.addItem(item); 
}

使用java產生rss xml檔案